Image Specifications
In addition to a photo’s subject and composition, there are other criteria it must meet to make it a good choice for using on the web.
A good web photo should:
- Have adequate lighting that clearly highlights the subject. Also consider secondary lighting to isolate the background and help ‘lift’ your subject into the foreground
- Have a resolution of 72 pixels per inch at the maximum size it will display in the page. Consider keeping a higher resolution version in your library for alternate uses (retina displays on mobile, print pieces, etc). Remember, you can always efficiently degrade quality, but you can’t add it by scaling up.
- Be saved in the correct color model. RGB (for screen viewing), not CMYK (for printing).
- Be saved in the right format: JPG for most instances and PNG when there is a need for transparency.
- Be copyright-free, or original work of a UT Health San Antonio staff member. iStock is a great place to source stock imagery, but consider the cost and availability of the image. If it costs very little and is not rights-managed, anyone else could use it (and probably will). With rights-managed images, you’re buying the licensing to use it, so it won’t be as common.
- Contain ALT text, captions, and a filename with descriptive keywords for the page on which it displays.
File Format
There are specific file formats in which to save the images in order for your image to load quickly for the web.
JPG (Joint Photographic Experts Group) - Most commonly used for photos because they retain all color information yet compresses the file size.
PNG (Portable Network Graphic) - Can be used for small images but not best for large images. Images can be displayed with transparent backgrounds. Best for text images.
GIF (Graphics Interchange Format) - Not the best for photographs because it does not use as many colors. Usually best for simple logos, text or flat images.
Dimensions
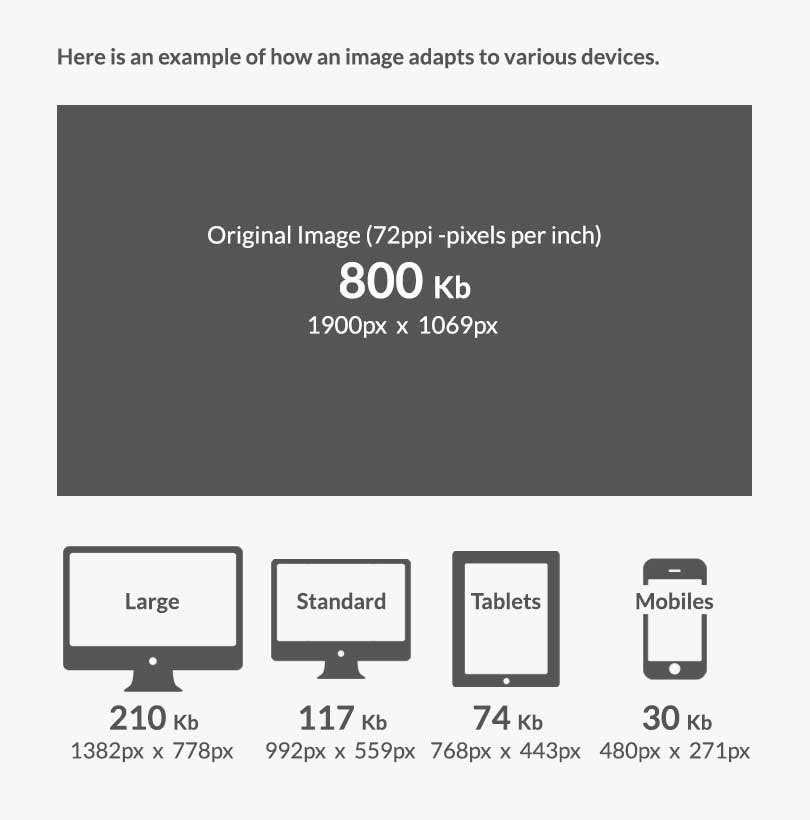
Generally you’ll want to save the image for viewing on a desktop computer because it is adaptive to smaller devices as opposed to sizing your images to fit a small device first to adapt to larger devices.
"Optimizing" Images
You can optimize images for the web using the “Save for Web” option or, depending on the program, you may have to use the “Export” option. When you “Save for Web,” the image resolution is automatically converted to 72 dpi regardless of its original resolution. However, the pixel width remains the same. Check your pixel width before optimizing. Downsize your image first in necessary.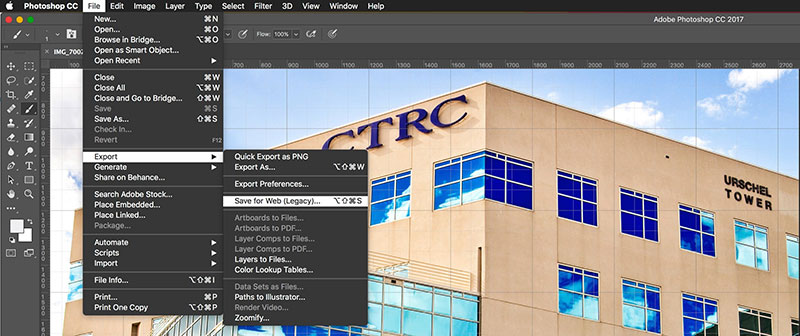
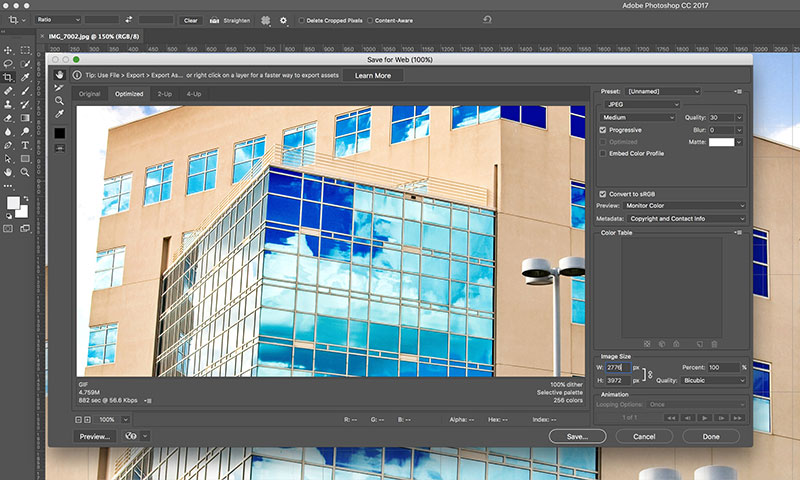
Check the “Progressive” box; select “Medium” or High; and enter the Quality 60 or 30. Choosing “Progressive” just means when opening a web page, the image will load blurry at first and then will appear clear once the image is fully loaded. “Optimized” means the image will load line by line.
In this case, the size in the image below is 1.14M, shown in the lower left-hand corner of the selection box and is too large for the web. The “Image Size” will need to be adjusted. The average image size for the web should be 50kbs and lower.
Cropping Images
Cropping an image is quite easy. Below are a few ways to crop an image correctly.
When cropping an image of a person, crop at the limb and not the joint part of the body.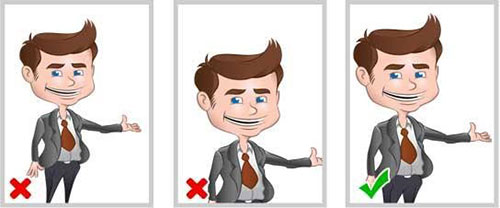
It's best to leave space in front of a person's face and not behind.
Try not to center the person’s face. Place the person’s face in the upper ⅓ part of the picture.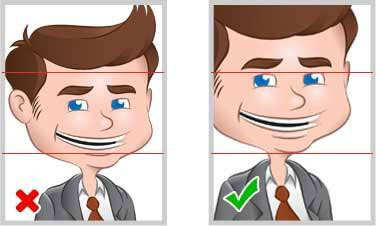
Try to crop out as much of the clutter in the background as possible. Look for eye direction. If the subject is looking at an object, try to include that object when cropping.
Color
Images need to use RGB (Red, Green, Blue) colors. If images are CMYK (Cyan, Magenta, Yellow and Black), they need to be converted to RGB. CMYK images saved as JPGs will not automatically convert to RGB and are considerably larger files than RGB JPGs.
Content for this page was taken from a presentation created by NewCity.